How to use fiber optic fusion splicers?
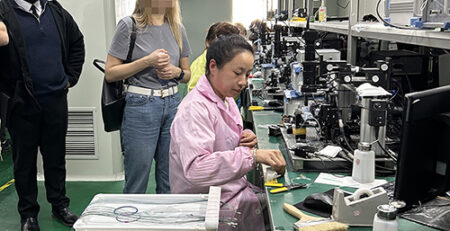
As fiber optic technology grows, fiber optical fusion splicers have become essential for cable installation and maintenance. These devices seamlessly join optical fibers, ensuring efficient data transmission. In this guide, you’ll learn what a fusion splicer is and how to use it effectively.
What is fiber optic fusion splicers?
A fiber fusion splicer is an instrument designed to permanently connect two optical fibers by fusing their ends together using heat. This process creates a seamless joint, allowing light signals to pass through with minimal attenuation. By employing this device, efficient and low-loss transmission of fiber optic signals between the fused fibers is achieved.
How to use fiber optic fusion splicers?
1.Preparing the fiber cable:
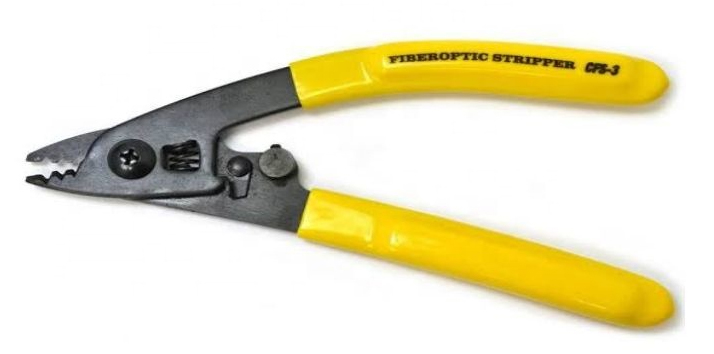
A fiber optic stripper is a tool used to strip away the protective layers of a fiber optic cable. This process involves removing the outer jacket, buffer coating, and often an additional protective layer to expose the bare fiber for operation. Since different types of fiber optics exist, the stripping technique may vary depending on the cable’s construction.
Once the fiber optic end-face is cleaned, it must be precisely cleaved using a fiber optic cleaver. The cut must produce a smooth, perpendicular end face to ensure proper alignment and successful fusion splicing later on.
2.Setting up the fiber fusion splicer:
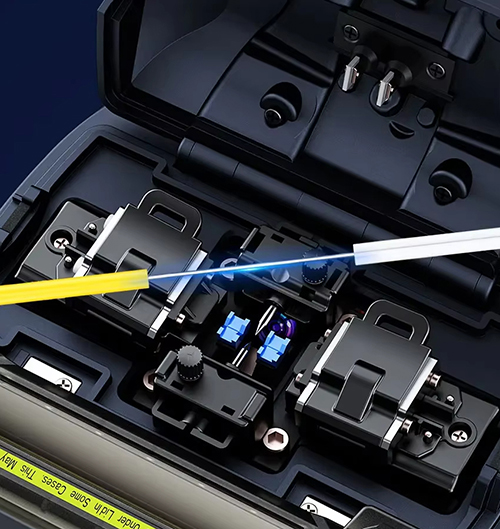
Power on the fiber fusion splicer, which typically performs self-calibration to verify proper operation. Next, carefully position the prepared fiber into the V-groove of the splicer, ensuring precise alignment and firm fixation within the clamping mechanism.
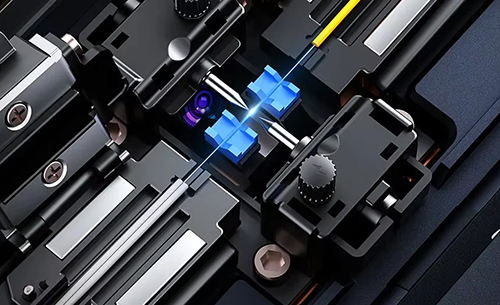
Fiber optic fusion splicers typically offer both automatic and manual alignment modes. In automatic mode, the machine self-aligns the fibers for optimal positioning. When using manual mode, operators must precisely adjust the fibers through the viewing screen to achieve proper end-face alignment and parallelism.
3.Start splicing:
Press the ‘Start’ button to initiate the fusion process. The splicer uses an electric arc to precisely melt and weld the fiber ends together. Upon completion, the machine automatically displays the splice loss value on-screen for quality evaluation.
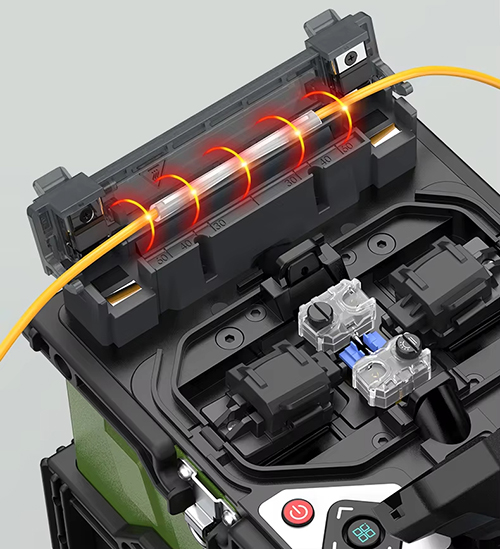
Once the splice is verified, position a heat-shrink sleeve over the joint and apply heat using a protective heating oven. This causes the sleeve to contract securely around the splice point, forming a durable protective seal.
4.Test the fiber optic:
Following fusion splicing, the fiber optic connection should be verified using an Optical Time Domain Reflectometer (OTDR) to measure splice loss and evaluate overall link performance. Should the splice fail, potential causes may include:
- Misalignment Issues
Proper fiber end-face alignment is critical – even minor deviations can cause significant signal loss. Always verify precise positioning before splicing.
- End-Face Contamination
Dust, oil, or other contaminants on the fiber surface will compromise splice quality. Thorough cleaning using appropriate tools and solvents is essential prior to fusion.

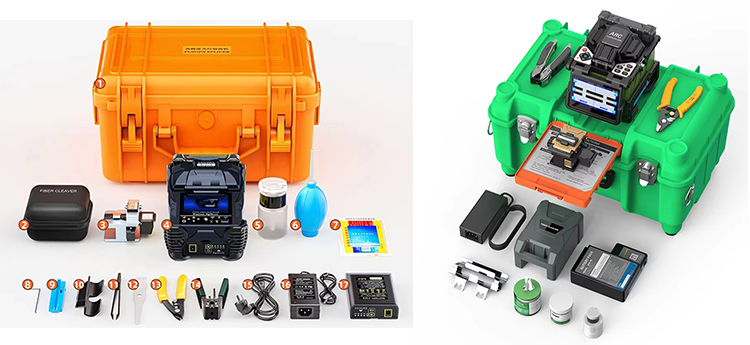
Related product:
Introducing Deepblue advanced fiber optic fusion splicer – engineered for precision and durability. Equipped with a quad-motor alignment system, it delivers exceptional splicing accuracy in a compact, lightweight design. The rugged construction offers IP-rated protection against dust, water, and shock, while the intuitive touchscreen ensures effortless operation.
With industry-leading low splice loss and versatile functionality, this splicer excels in diverse environments – from field deployments to laboratory applications. Its reliable performance makes it the ideal solution for all your fiber splicing needs.